Documentation
Introduction to Aether
Try It For Yourself
- Prerequisites
- Install and Configure
- A Simple Aether-Based Solution
- A More Complex Aether-Based Solution
- Adding Aether Connect
Aether UI User Guide
A More Complex Aether-Based Solution
In the last demo, we built a very simple pipeline to demonstrate the flow of data through Aether and show how an input data document is combined with a simple map and output schema to create a new entity that can be sent to another system. In this demo, we’re going to take raw JSON data that has been collected during a microcensus, and generate 4 entities that are all linked together. The following demo will show how to send those entities to different downstream systems.
The assets folder of the aether-bootstrap repository contains some sample data, some schemas and a set of mappings. For the purposes of this walkthrough, we’re going to copy and paste the contents of these files into the Aether UI (for a more detailed overview of the UI, check out its documentation).
You should already be set up, logged in and looking at a mostly empty AUX//Pipelines screen from the install step
We’re going to create a new pipeline, so hit the button that’s handily labelled NEW PIPELINE. Enter a name, and press START PIPELINE.
Defining Our Input
The first thing you see is the input screen. This is where you tell Aether what your input data looks like. You can do this in one of two ways:
- provide an AVRO schema
- provide a sample of some raw JSON data
For this walkthrough, we’re going to do the latter. Open the sample-data.json file from the assets folder, copy the contents, and paste it into the text area. It should now look like this:
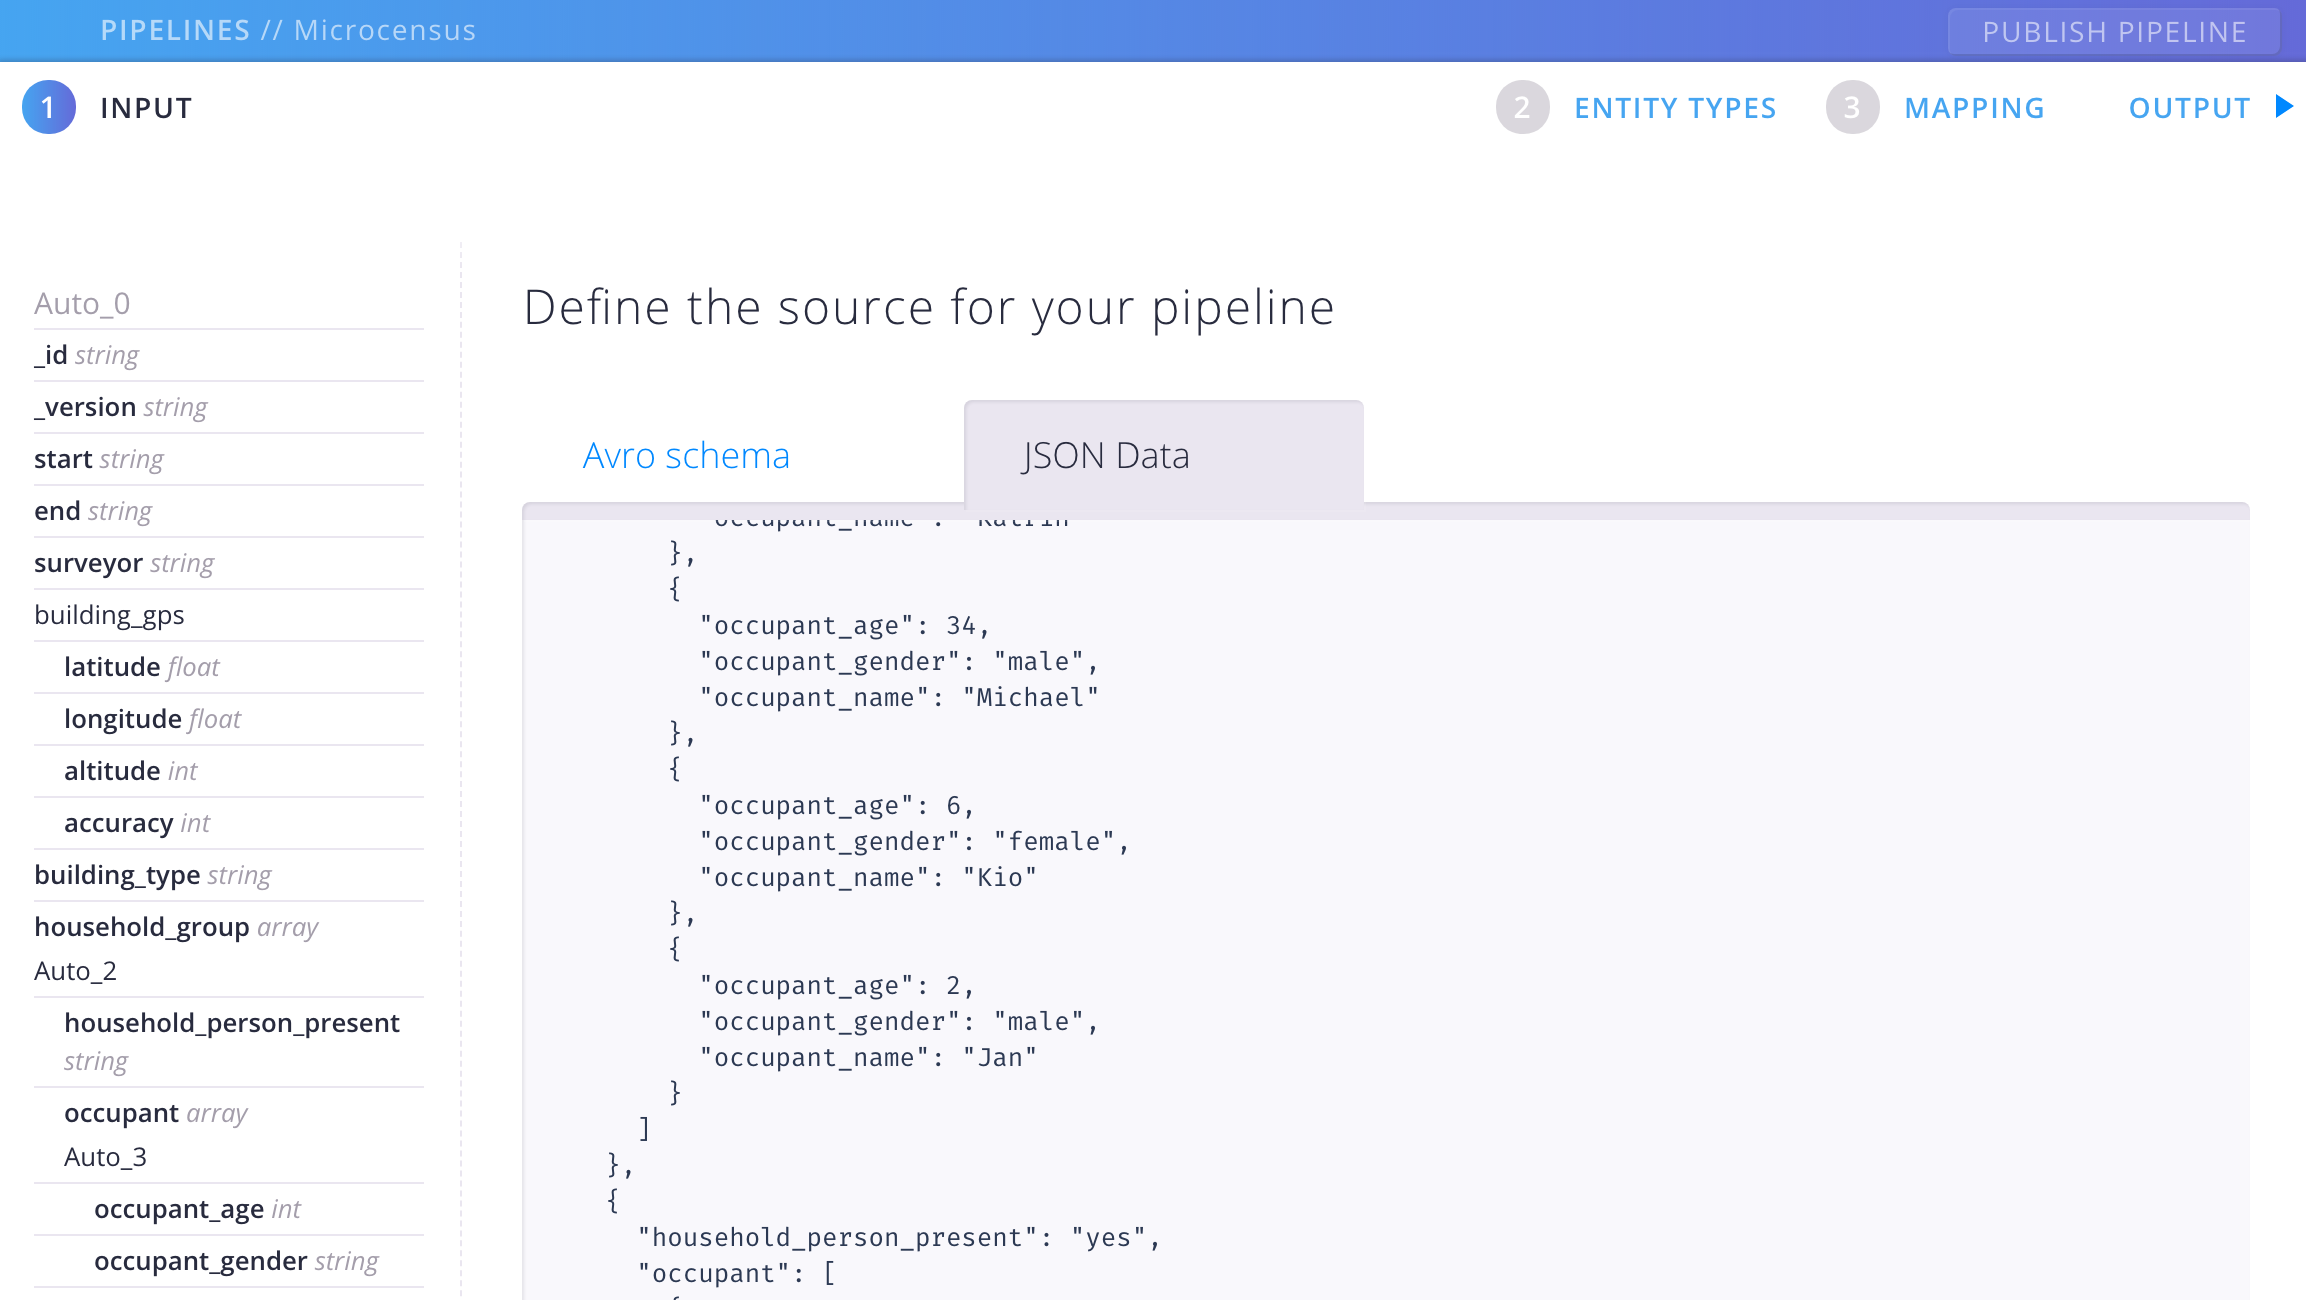
At the bottom of the screen is a button labelled DERIVE DATA FROM SCHEMA. Click this, and Aether will generate an AVRO schema for you. The structure of the sample data is now shown in the sidebar.
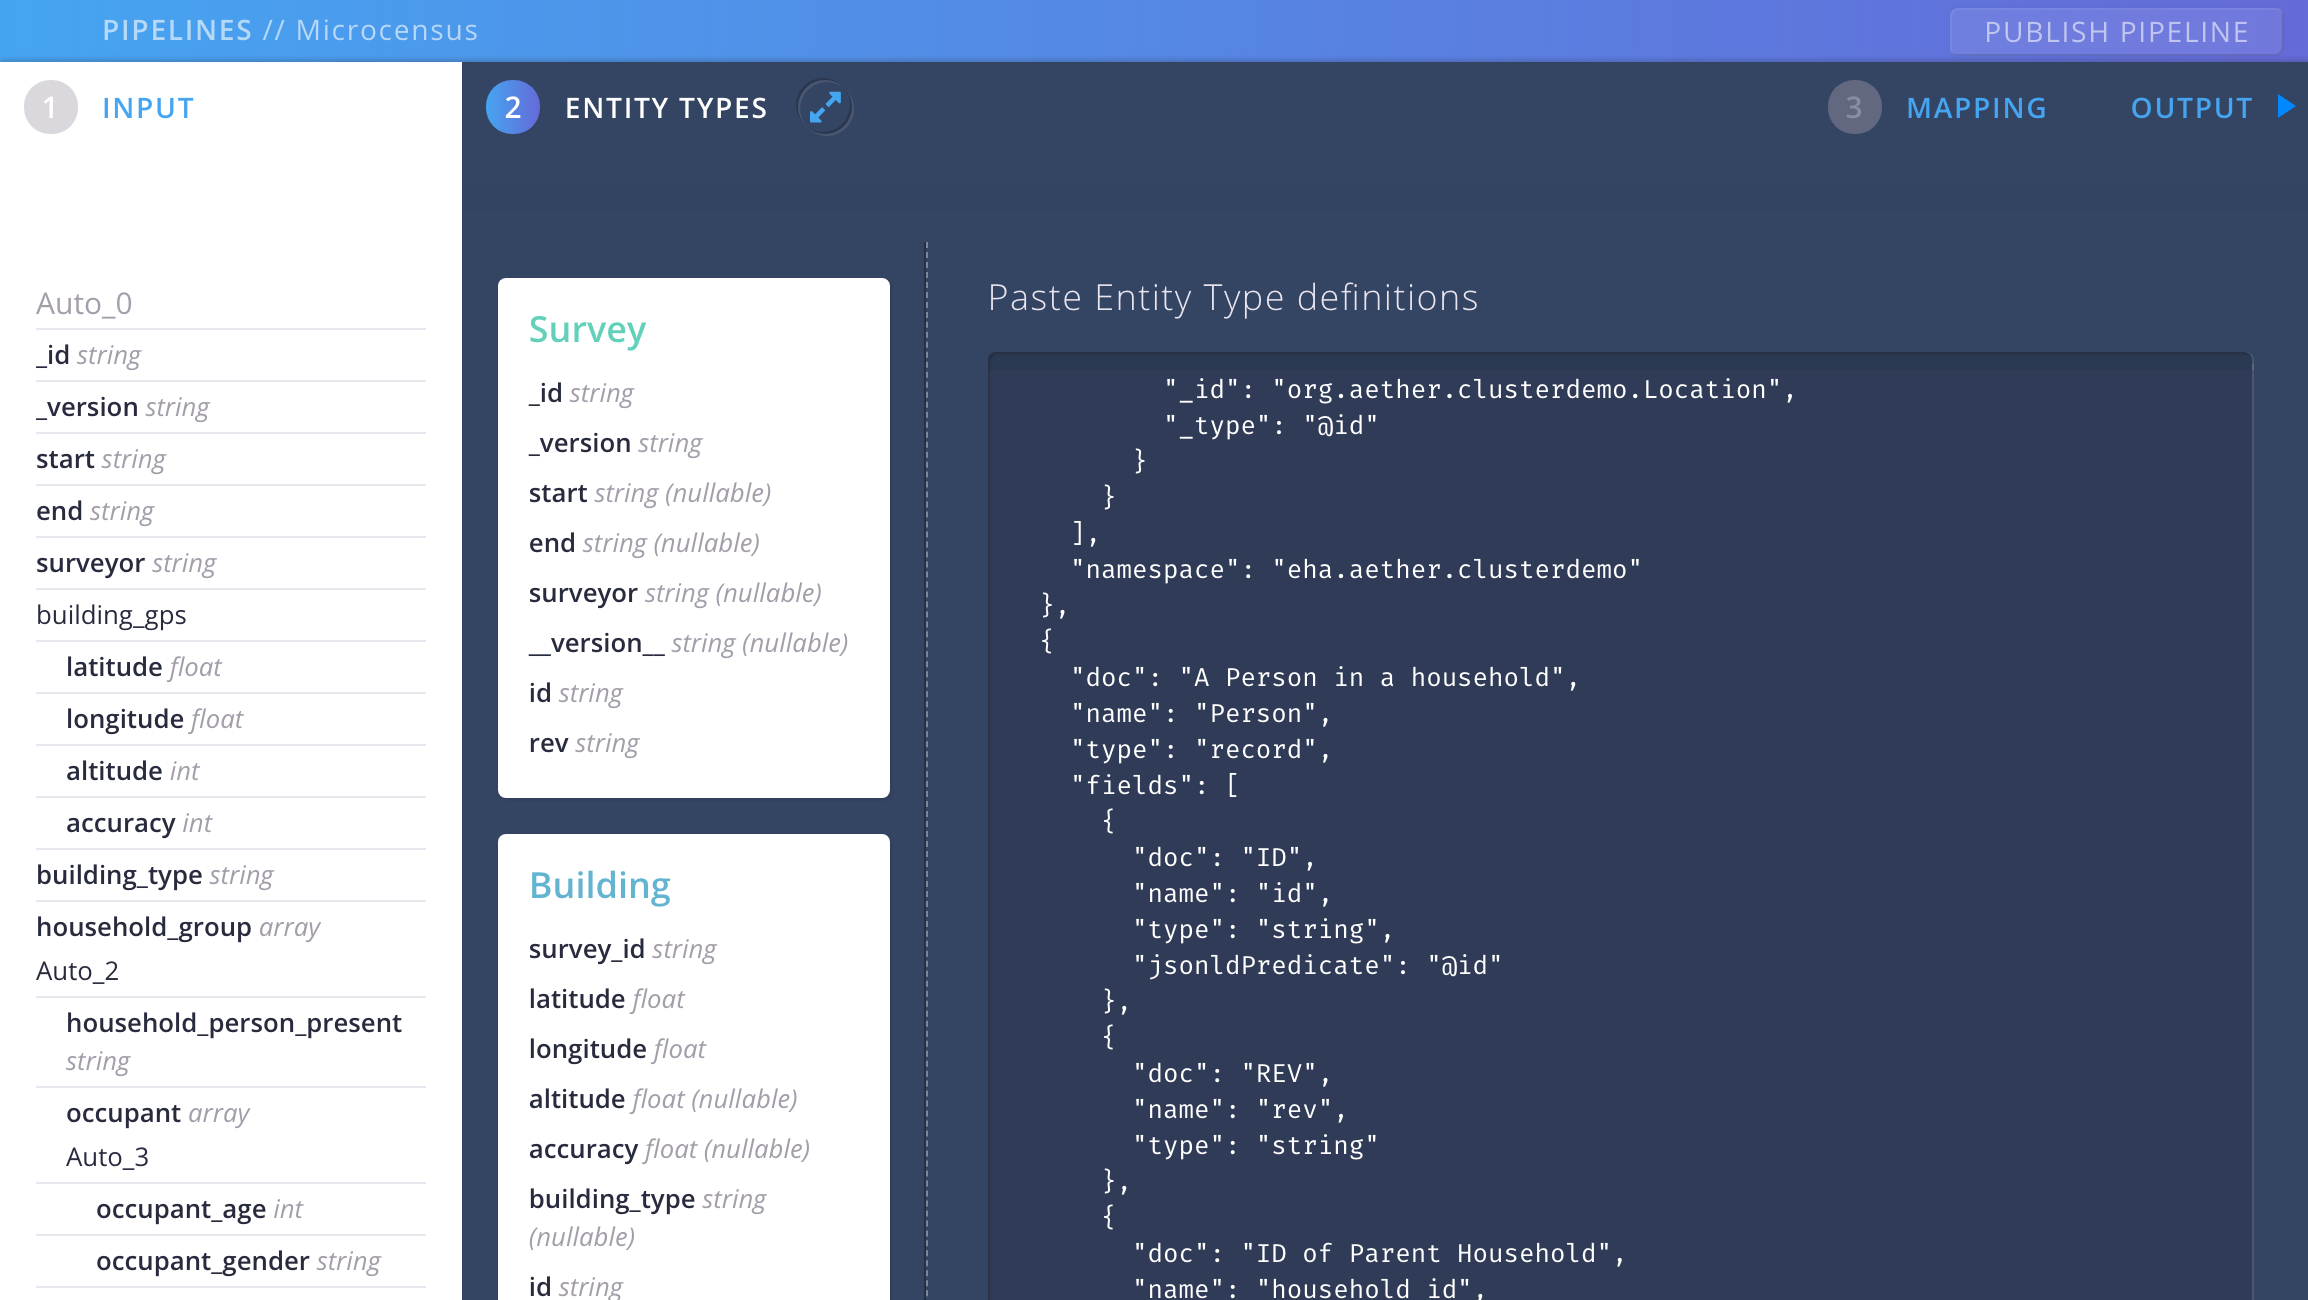
Defining Our Output Contracts
Now we’re going to add some entity type definitions. These are (more) schemas that constitute the data contracts we mentioned earlier. Click on ENTITY TYPES, open all.json in assets/schemas and copy and paste everything into the text area where it says Enter your schemas. Click ADD TO PIPELINE.
Defining Our Mappings
The third and final step is to create the mapping rules that specify how the input data is transformed into entities. Normally you would probably add these mappings one by one using the interface provided by the UI, but for the purposes of this walkthrough we’re going to - you guessed it - copy and paste the mapping definition from the assets folder.
Open up mapping.json from assets/mappings/ and copy the contents. In the UI, click on MAPPING, and then go to the tab labelled JSON. Paste everything into the text area and click on APPLY MAPPING RULES TO PIPELINE.
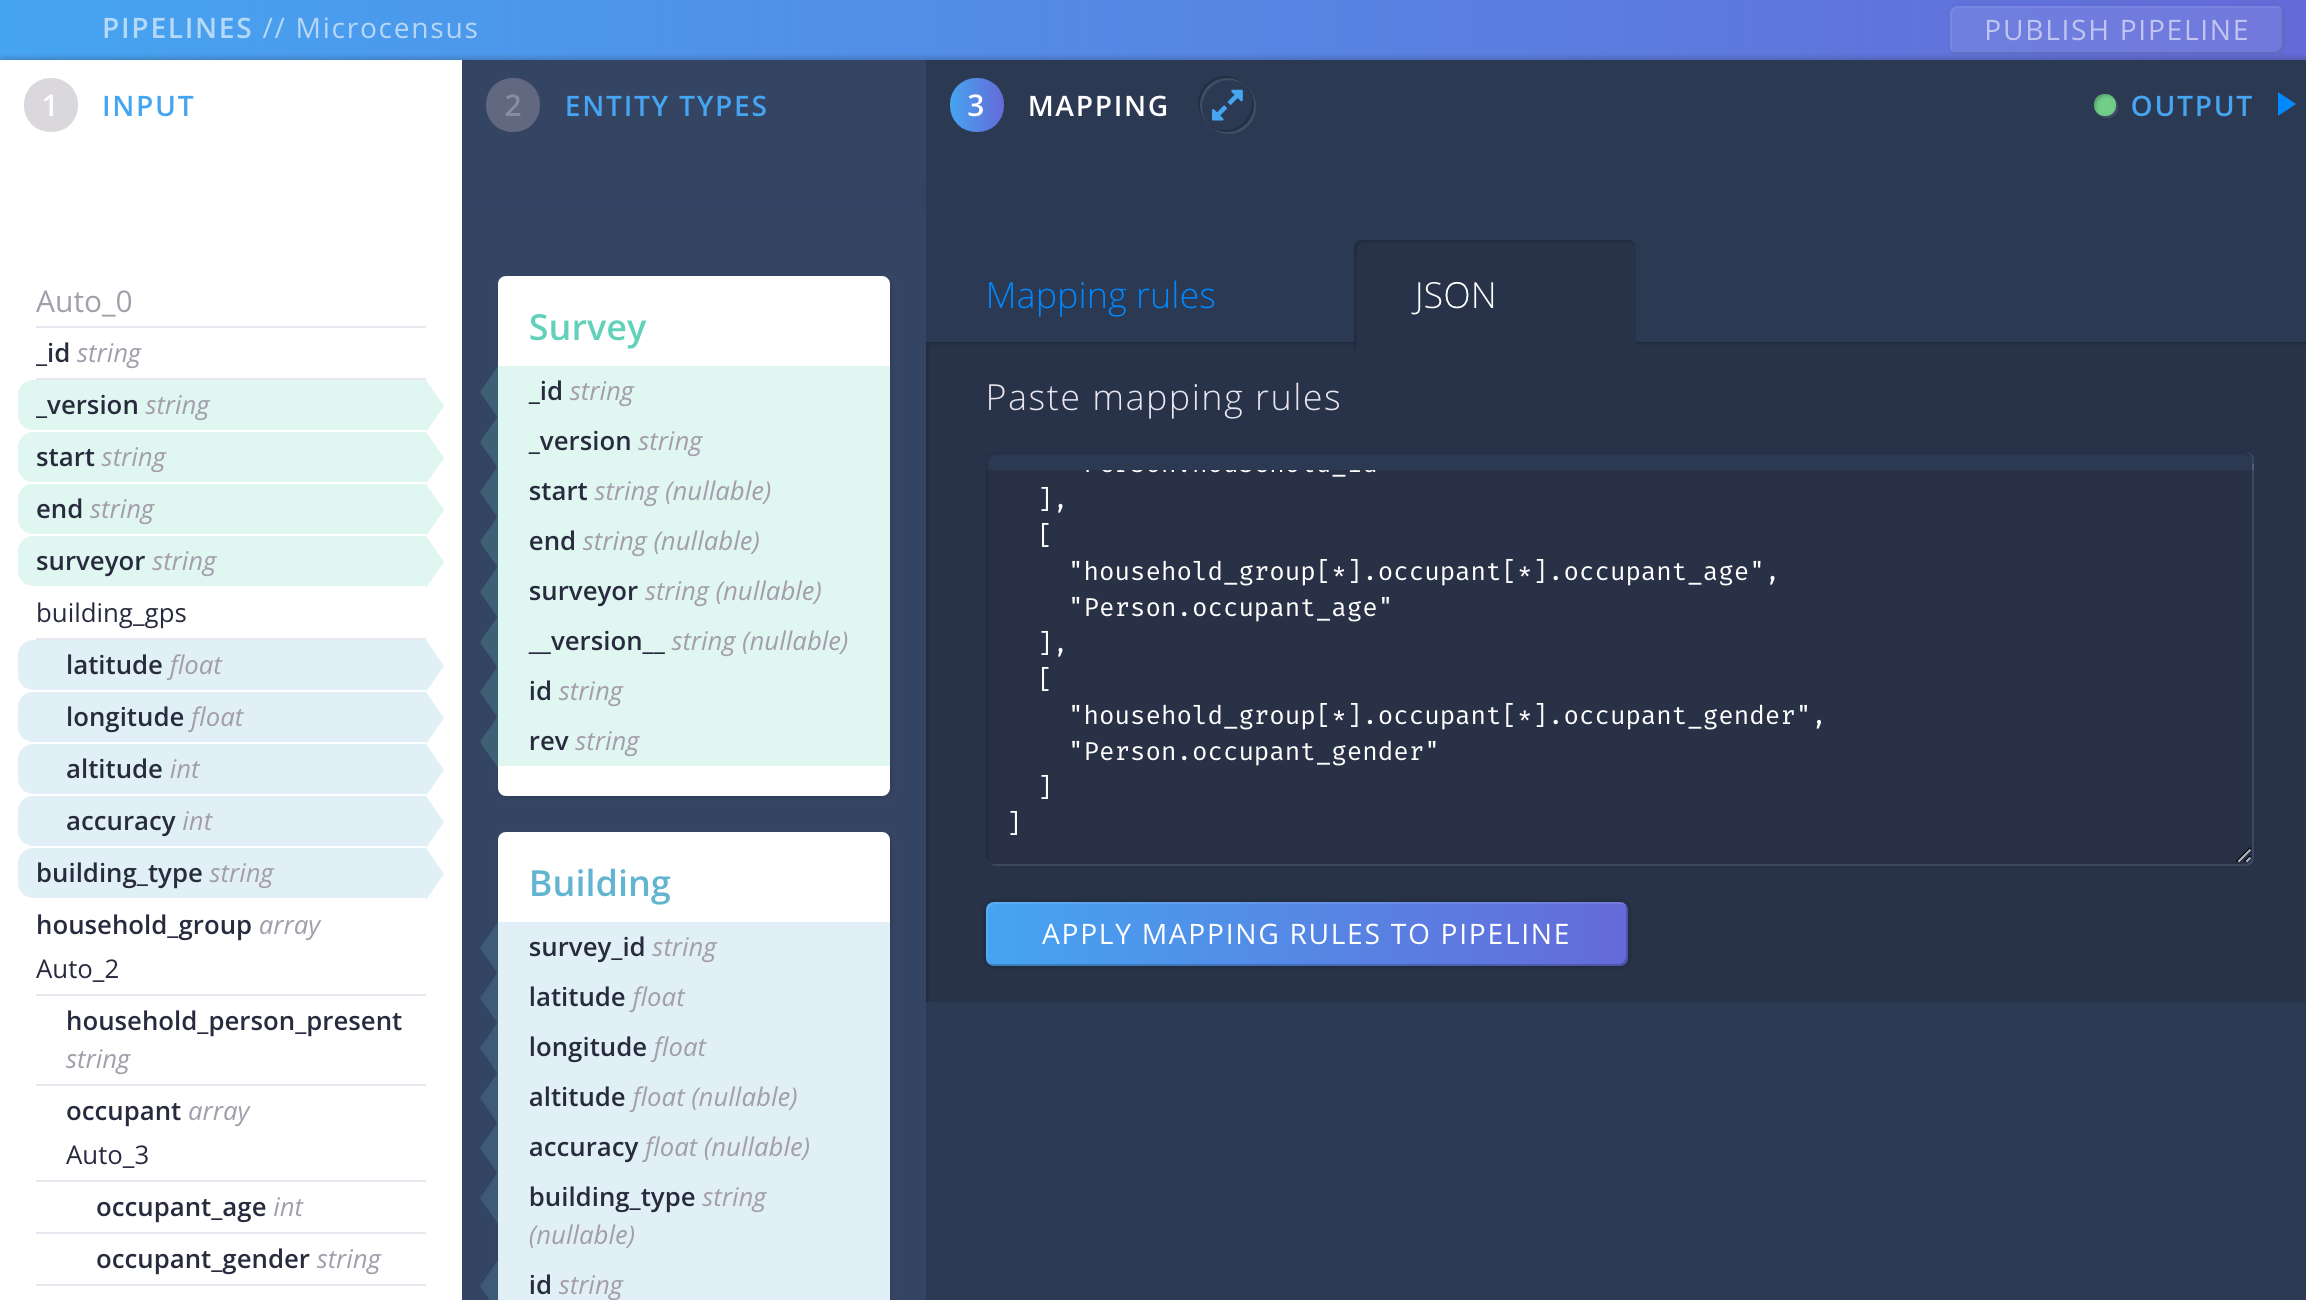
Fields in the INPUT and ENTITY TYPES sidebars are now highlighted to indicate mappings between them; if you click on the Mapping rules tab you can see the individual mapping rules.
You might also have noticed the green dot next to the OUTPUT section in the top right hand corner of the screen. This indicates that your pipeline is successfully creating entities, i.e. that the data is being transformed and broken up into pieces as defined by our schemas. Open the OUTPUT screen, and you’ll see the transformed data.
Now you can hit the PUBLISH PIPELINE button at the top right. Your pipeline is now live and ready to receive data. Let’s check this by sending it a raw JSON submission. We’re going to use curl to send a JSON file to the API endpoint that was automatically created when you published your pipeline – but first we need to locate that endpoint…
Submitting Data with the API
The following curl command will tell you all the mappings that have been created on your Aether instance. If you have been following these instructions from a fresh install, there should only be one.
curl http://admin:adminadmin@aether.local/dev/kernel/mappings/
(Note that we’re using basic auth here; obviously this is not how you would authenticate on a production instance)
The output of this command should be a JSON description of the mapping that you just created with the UI, looking something like this:
{
  "count":1,
  "next":null,
  "previous":null,
  "results":[
    {
      "id":"2e4d2216-aade-48ef-8bc3-12f4792df07a",
      "url":"http://aether.local/dev/kernel/mappings/2e4d2216-aade-48ef-8bc3-12f4792df07a/",
      "project_url":"http://aether.local/dev/kernel/projects/774e33c8-d82b-43f9-82e4-27bb513aff68/",
      "submissions_url":"http://aether.local/dev/kernel/submissions/?mapping=2e4d2216-aade-48ef-8bc3-12f4792df07a",
      "created":"2018-07-09T13:11:43.562140Z"
      ...
    }
  ]
}
The important field for us is the id of the mapping; this needs to be included in any data that we submit. So let’s do that now: open assets/submission.json in your favorite editor, and copy and paste your mapping id into the second line where it says "mapping": "2e4d2216-aade-48ef-8bc3-12f4792df07a" and replace the 2e4d2216-aade-48ef-8bc3-12f4792df07a with your id. It should now look something like this:
{
  "mapping": "<your id>",
  "payload": {
    "_id": "fKPopgxGLyzTUIPelIYLLJhGOYVEa",
    "_version": "YUPRCpknNpjXoRIeFIbTaqcVYBd",
    "start": "2018-07-01 15:32:05",
    ...
  }
}
Now we can use curl to post this file to Aether:
curl \
    -H "Content-Type: application/json" \
    --data @assets/resources/submission.json \
    http://admin:adminadmin@aether.local/dev/kernel/submissions/
Aether is now going to take this submitted data and do entity extractions based on the mappings that we set in the UI. We can check the results of this process by accessing the entities endpoint:
curl http://admin:adminadmin@aether.local/dev/kernel/entities/
You should get a sizeable chunk of JSON code that represents the entities that were extracted from the sample data that you just submitted. The first key in the JSON should be count, and the value should be 18 - 18 entities were extracted, as the microcensus data was broken down into Surveys, Buildings, Households and People (or actually, Persons).
(At this point you may be saying to yourself, “That’s all very nice, but I don’t actually want to break my data up into separate entities”. That’s fine too - Aether can also create a pass-through pipeline for you, whereby the data that comes in is just passed through to the output without any extraction taking place - take a look at the UI documentation to find out more about how to do this)
Congratulations! You have just completed the set-up of your first Aether-based solution.
Recap
- We learned about pipelines
-
We learned about the constituent parts of a pipeline:
- Input data
- Schemas
- Mappings
- We set up an example pipeline with the Aether UI
- We submitted some data to an API endpoint and saw how the pipeline was used to extract entities
The next step is to extend the data pipeline so that it flows all the way out to CKAN.